Often, in enterprise environments especially, it is useful to keep track of certain activities — like when files have been modified, who modified them and at what time. This is the basis for file auditing and in this post we will explore some of the basics of getting file and folder auditing setup in Windows-based environments using Powershell.
Enable File and Folder Auditing
File auditing is a big box to check off the list in enterprise environments. It shows auditors a very nice trail of who has accessed files and at what times. It is also very nice to have a record of when files were deleted and by whom. In the case where somebody comes and asks if you can recover a file, you can just go look at your audit logs and reports to determine when the file was deleted, then you can use your favorite backup and restore tool to go back to a date previous to when the file deletion occurred and grab it.
The method I’m using for turning on file and folder auditing was adapted from this guide.
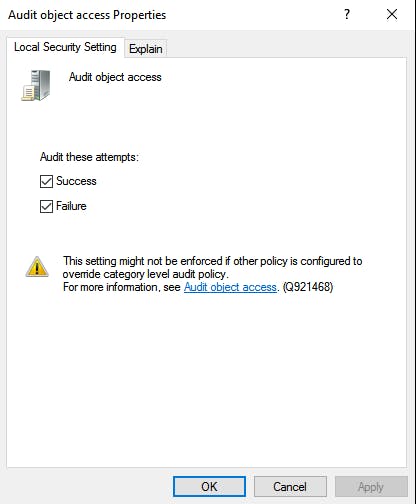
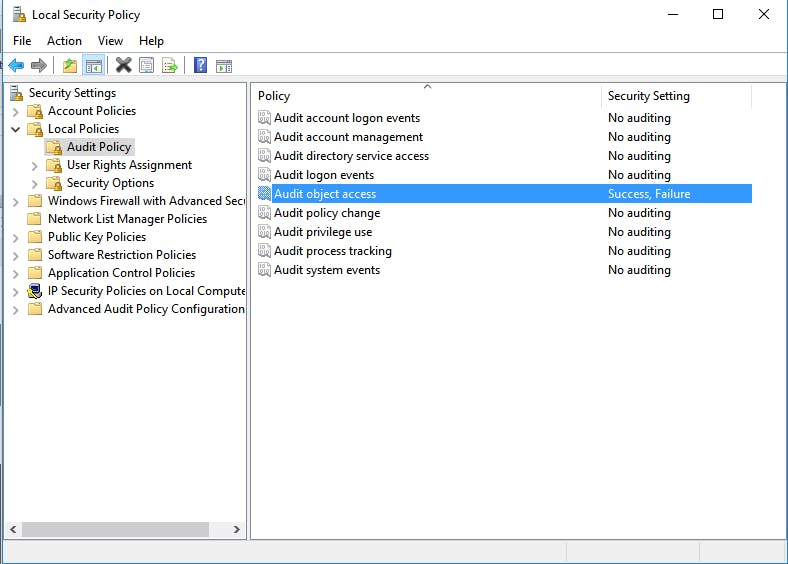
Open Administrative tools (by Windows search or by navigating through control panel), click “Local Security Policy” -> Pull open “Local Policies” -> “Audit Policy” -> Select “Audit object access” and choose Success and Failure, then click apply and ok.
When it’s done it should look similar to the following screenshot:
Configure Auditing
Now that the file and folder security policy has been configured globally, you can apply it to specific files and folders.
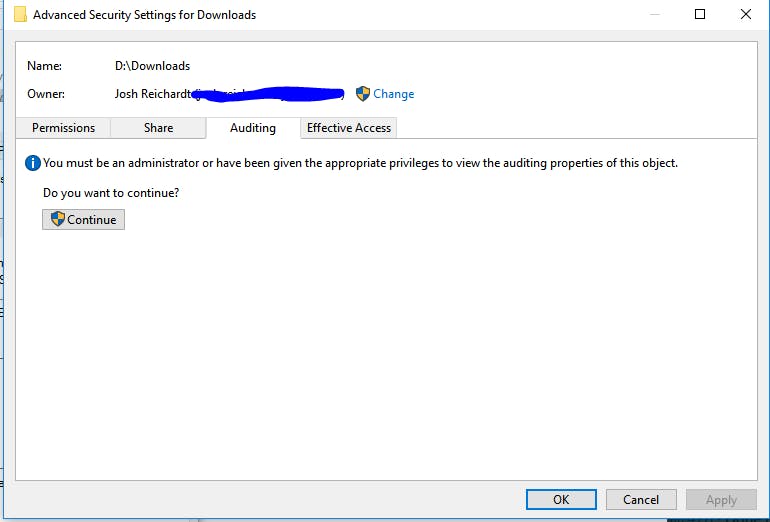
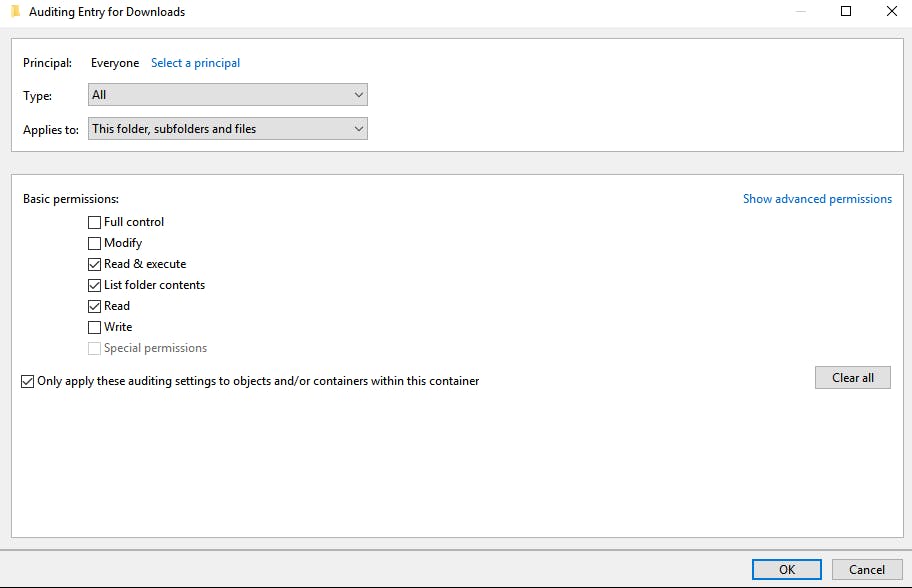
This step requires admin privileges. Choose the folder to enable auditing for, right click -> Properties -> Open the “Security” tab -> Click “Advanced” -> Open the “Auditing” tab. It should bring you to a screen similar to the following.
Click “Continue.” You will need to choose EVERYONE as the Principal here. This basically will ensure that all users that access the files will be audited. This setting can be specified for groups but in this example, I’m just keeping things simple.
Note the “Type” is set to all. You can choose to audit either success or fail or both, which is what we’re looking for in this example. Also change “Applies to” to this folder, subfolder and files. This ensures that everything in the example folder gets audited.
Now that everything is configured we can test out the auditing.
Use Powershell to Work with Event Logs
To work with the Windows Event logs you will need to be in an elevated Admin prompt.
One thing that is important to know about when creating the Powershell script is how events are labeled in the Windows event log. Below is a mapping of Event IDs along with their associated actions in the Windows OS.
4656 – a handle was requested
4659 – handle was requested with intent to delete
4660 – delete confirmation for created/deleted/recycled objects
4663 – object access
0x10000 = object delete/overwrite/rename/move
0x2 = object modified
0x80 = read attributes
With this information in mind, we can start writing our script to audit file access. The bulk of the log processing is accomplished via the Get-WinEvent cmdlet.
There is a nice read here regarding the differences between Get-WinEvent and Get-EventLog. The long and short of it is that Get-EventLog is much slower and is pretty much only useful for legacy systems at this point. For most log processing these days, use Get-WinEvent.
Basically, the idea is to iterate over the Windows event log messages to 1) determine if the log was a file access Object and 2) figure out what kind of file access object it was, if it is the kind of log we were looking for originally. Outside of this logic there is some code for cleaning things up, weeding out false positives, handling some edge cases and creating the reports,
I can’t take much credit for this method because my script is basically adapted from this script originally. The main difference is that I added HTML reporting, stripped out a few things I didn’t want and polished up the code a little bit. In fact, you could download and run the original script and it would work, there just wouldn’t be any HTML report.
To run my version of the script, make sure to be in an elevated Powershell prompt and download the raw gist.
> Invoke-WebRequest -uri https://gist.githubusercontent.com/jmreicha/b382d3897eabf1940f3e94604c870e7f/raw/9a0b3379d4d916b60b675703eb41d6cb6688d42f/audit.ps1 -OutFile ~/audit.ps1
Then navigate to the location of the script (above I just used my home directory) and execute it.
> ./audit.ps1
It takes a minute to run but when it’s done, there should be a new file in C:\Audit\File-Audit-Reports called “Audit of changed files on –
And if you open the file, it should contain the recent changes to items in the configured directory.
The script also creates an HTML file in the same directory with the same information that the CSV contains.
One thing that might be interesting as an exercise to the user would be to create some graphs/tables in Excel that indicate when files change, or which files get changed the most. The HTML report doesn’t have any styling so adding styling could be another interesting task for the reader.
Wrapping Things Up with PowerShell File and Folder Auditing
If you refer back to my last post we covered steps for running the script as a scheduled task, as well as steps for emailing the reports automatically at a specified time. Setting up automated file audits is easy and it will make many people happy, so it is a win-win scenario for you.
There are a lot of concepts that you will have to learn to get this script working if you are new to Powershell, assuming you didn’t copy/paste the code, including functions, dynamic arrays, hash tables, XML object conversion, WMI, nested looping and some other deeper programming concepts.
These concepts are very valuable and 100% worth learning. I recommend pulling open the script in your favorite text editor and hacking around with it to learn how it works and to begin understanding some of the higher level concepts mentioned above.
All said and done, it is easy to see that a little bit of Powershell magic goes a long way. The logic for creating file audits can be complicated but in the long run is totally worth the effort of learning. Many of the techniques learned here can be applied to more complicated scripting tasks and it always good to learn new things.
BECOME A DEVOPS PRO
FREE DEVOPS COURSE
- Docker Tips and Tricks
- Agile Methodologies
- Documentation and Tools Hacks
- Containerization vs Virtualization
